Friday, April 16, 2010

Oooo...fun! A Giveaway!


So, usually this Friday spot is occupied by a wonderful fiber artist. I decided to shake things up a little bit and do a giveaway instead. I highly doubt there will be any complaints!

You might be asking, "Who is the illustrious fiber artist that is sponsoring the giveaway?"

Well, I decided to hit up someone I know very well and have been following her work for years. O.K., it's me!

Your next question is probably, "What's the loot?"

The 'loot' is one of Desert Dyeworks Starburst Mandala Playsilks. Specifically, this one.

Your child can become whatever they imagine using a playsilks. The silk will transform your child into a butterfly, a wizard, a princess, or anything they dream. There is no limit to a child's imagination!

This is a hand dyed play silk. The silk is a large 45" x45" 8mm habatoi(china silk) square. It is dyed using high quality Procion dyes that will last a lifetime.

So, how does one enter to win this playsilk. It's pretty simple. Leave a comment below, making sure you add your email address in the appropriate box so that I can contact you if you're the winner. Don't worry, I won't use it to spam you, I prefer Bacon! The giveaway ends at Midnight(12:00a.m.) PST on Friday April 30th, 2010. Winners will be chosen at random. I will get in touch with the winner within 24hrs. of the contest ending and the winner will have an additional 72hrs. to get in touch or a new winner will be chosen.

Speaking of Bacon! A second chance to enter the giveaway is to head over to Esty's Team Bacon! blog, check out one of my team members shops, and leave a second comment here with a link to your favorite item from that team member's shop. Gotta give my team member's props because they are the bacony best!

Alrighty then, get to it!

Friday, April 9, 2010

Friday's Fiber Artist - Hidow Fiber Farm


So, after learning a little bit about her farm and fiber art plans for the Summer, my daughter and I have decided we are moving in with Hidow Fiber Farm! She doesn't know this yet, but we are very excited to shear some Alpaca, spin some fiber, and dye it using the luscious Summer flowers around the farm.

Seriously, despite the hard work that goes into raising these animals, who wouldn't dream of being that close to the source of all that luscious fiber? In my mind it's akin to knowing and being apart of where your food comes from.

Alpaca are bred all over the world for the soft and silky fiber that is produce from its coat. Originally Alpacas were kept as domesticated in the South American Andes, where they were a primary source of fiber for textiles as well as a source for meat. Though, the use of Alpacas for meat in modern times is virtually non-existent, Peruvian law prohibits it.

Alpaca fiber is a wonderful alternative to sheep's wool. It is generally not prickly like sheep's wool and contains no lanolin, which makes it hypoallergenic. The two primary breeds of Alpaca bred today are the Huacaya and Suri. The Suri is identified by its long 'dreadlock'-type fleece, which produces longer silky fibers. Huacaya have a denser, 'woolier' fleece.

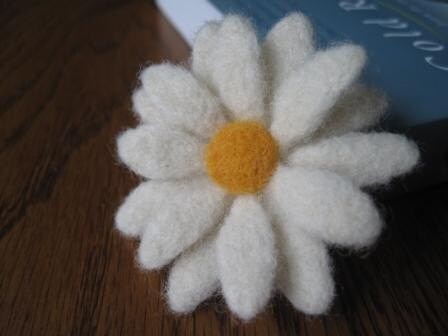
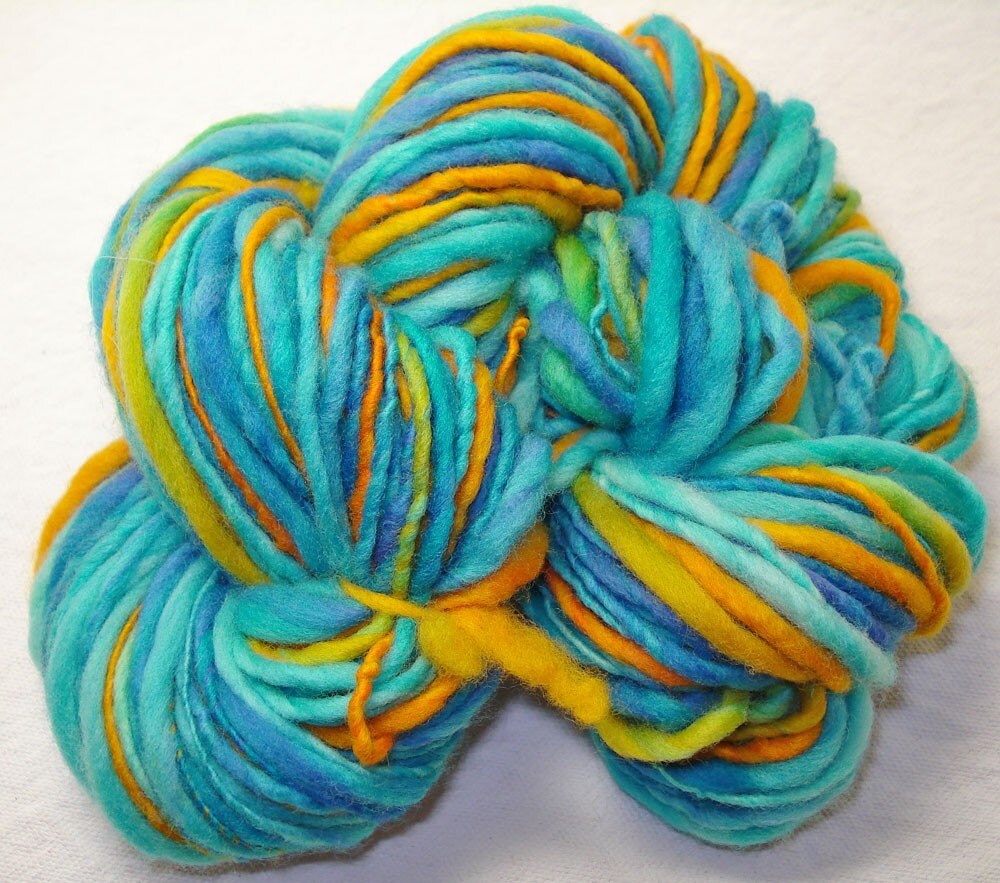
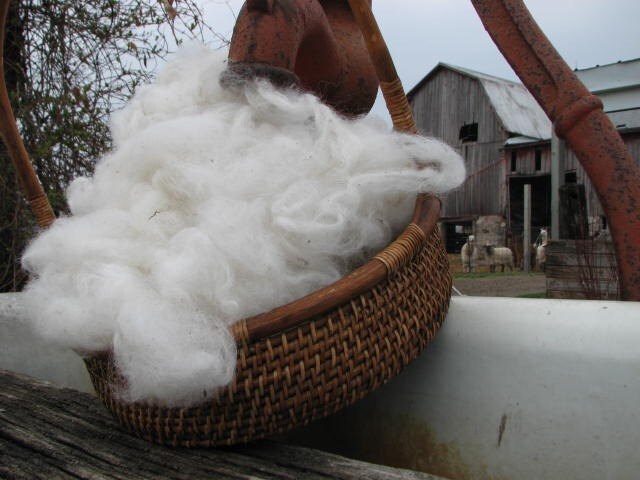
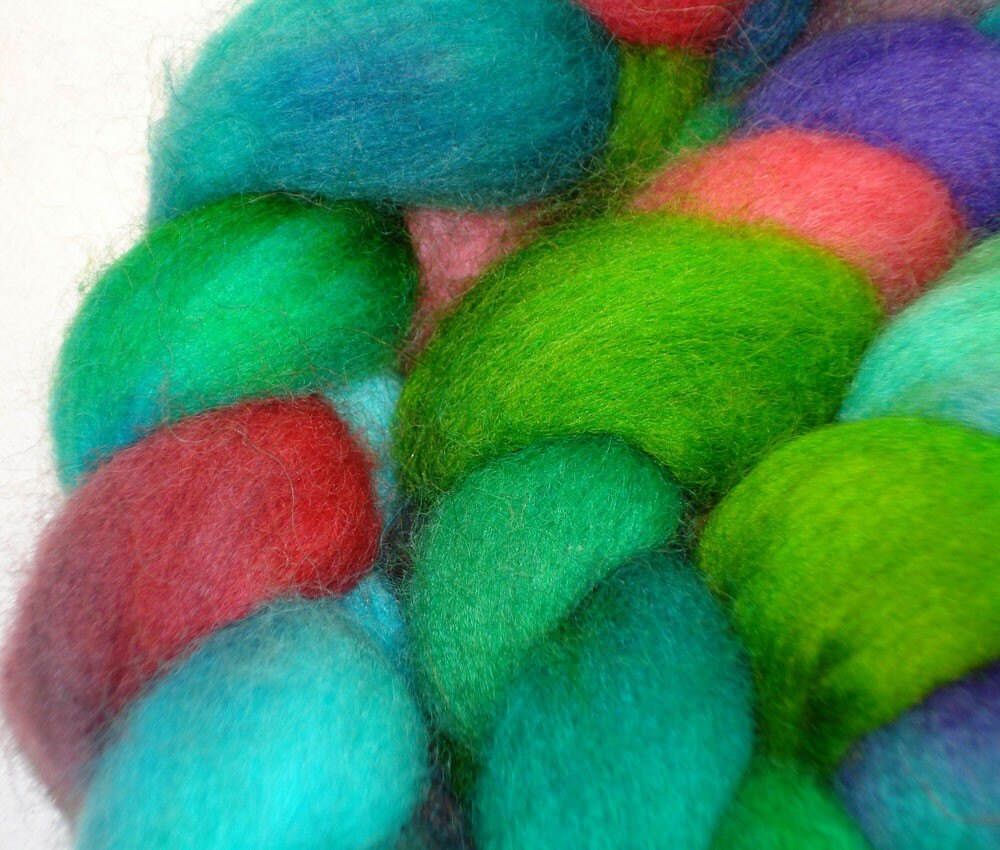
Huacaya Fiber from Hidow Fiber Farm
Veronica, the talented 'fiberista' of Hidow Fiber Farm, has exploded  with creativity in the few short years she has been playing with fiber. Besides the the wet felt and needle felt creations she makes, Veronica also shares her wonderful Alpaca fiber and sheep's wool with us fiber addicts.

A passion for man's best friend, dogs (sorry cat lovers!), inspires many of the needle felt creations in the Hidow Fiber Farm's Etsy shop. I especially love her Samoyed pup. The big tail flopped to the side gives it a wonderful personality!

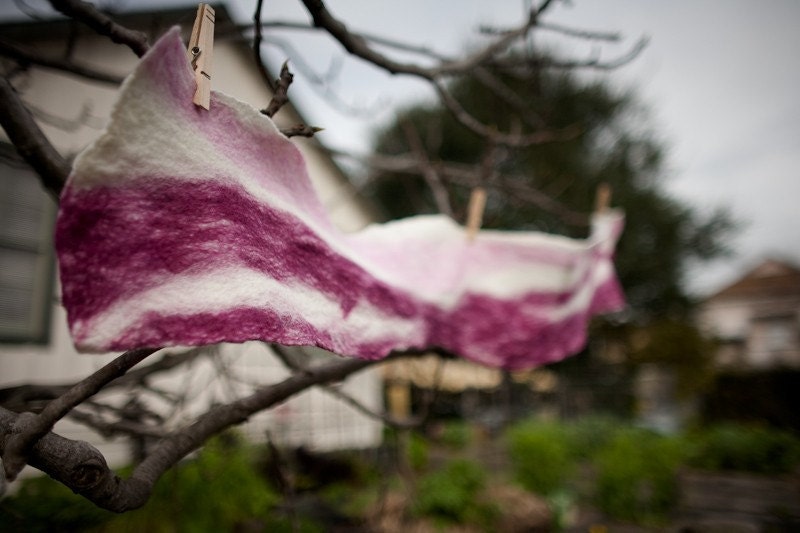
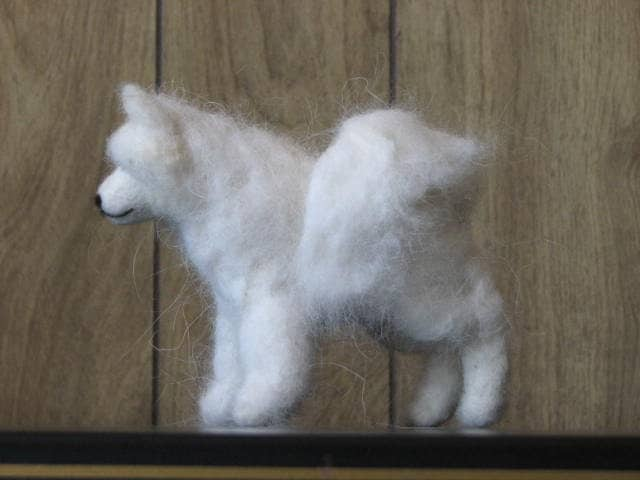
Needle Felt Samoyed by Hidow Fiber Farm
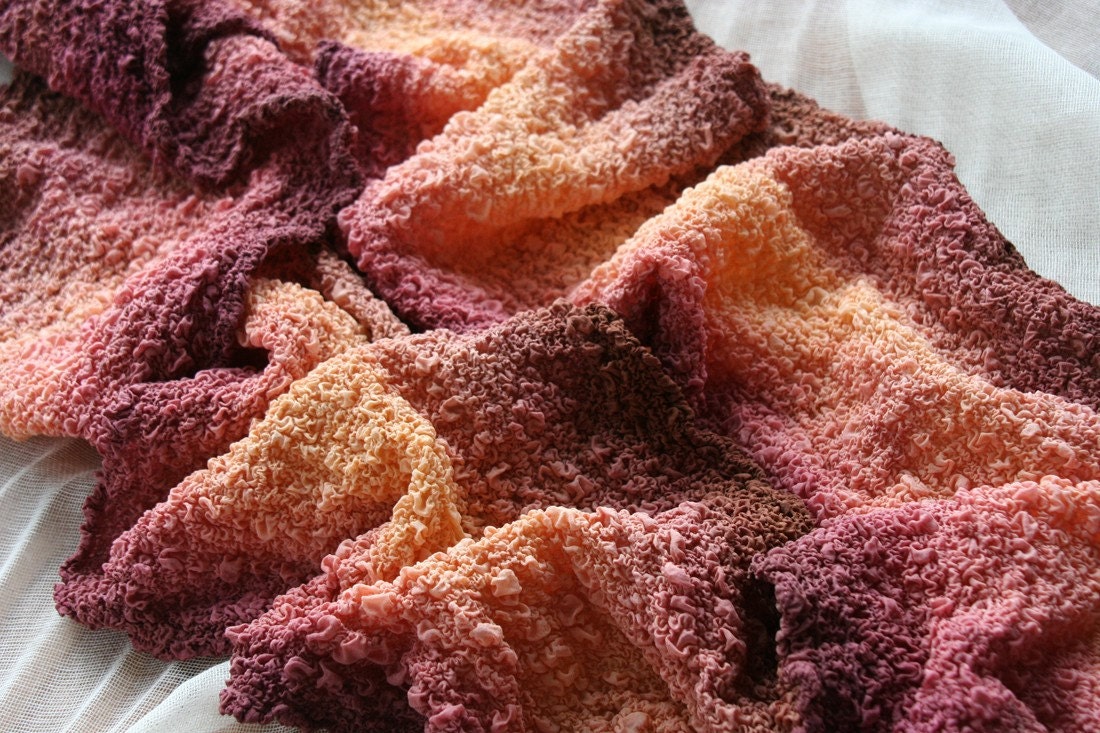
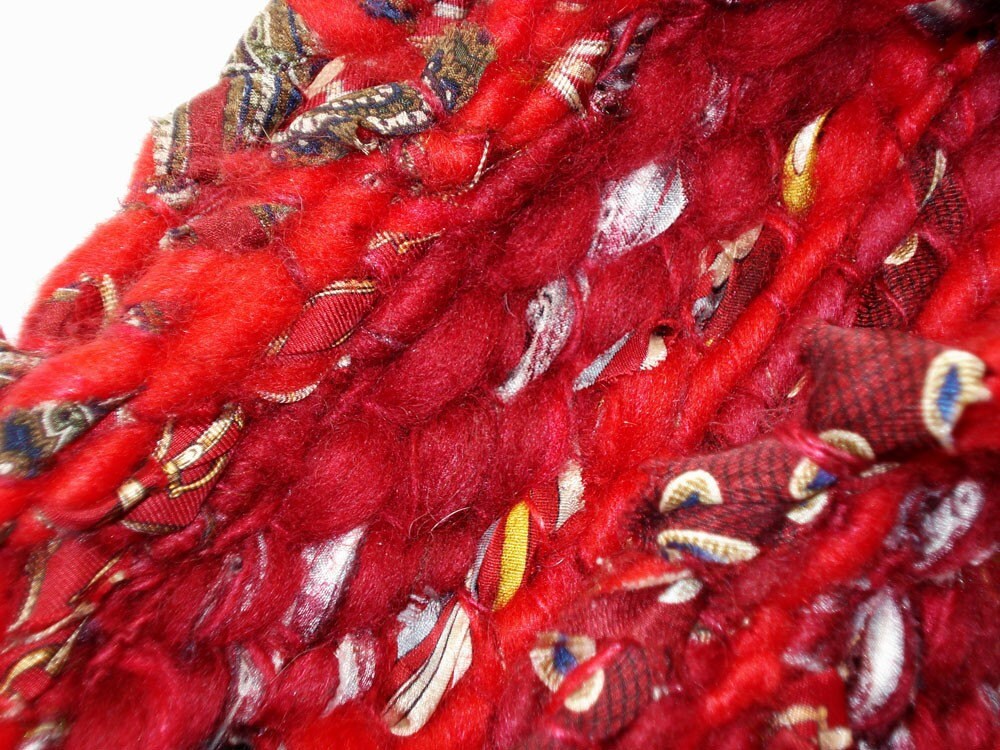
Though as a dyer I love bright colors, this brown/red Suri fiber does it for me!

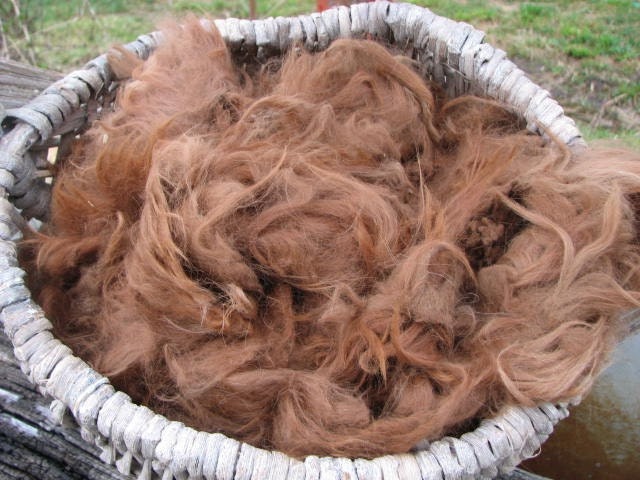
Brown/red Suri Fiber by Hidow Fiber Farm
 But enough about what I think! Let's here from Veronica herself:
"Hidow Fiber Farm is located on over 100 acres in the Thumb area of Michigan. Our farm has been in the Hirons family for over 125 years. Grandma and Grandpa Hirons only had girls, so when we bought the name changed to Dowling. The name of Hidow was thought up by Grandma, it was her way of combining the family names to represent the farm, we have kept it in her honor.
I have always been interested in the process of fleece to yarn, and I dreamed of learning to spin someday. While showing dairy goats around the country I used to love watching the llama and alpaca shows and visiting the alpaca area but because of their prices never dreamed I would own one. Two years ago the dream of owning an alpaca became reality.   My first 3 Huacaya alpacas were rescues, traded for bales hay.  Soon after, the local alpaca herd was selling out and I added several.  This spring I bought another 5 Suri fiber males.   Currently we have a total of 13 Huacaya and Suri Alpacas and a flock of Shetland sheep.
I jumped into the fiber world with both feet, even before I had any of my own to play with.  A drop spindle bought from ebay along with some fiber and You Tube videos taught me how to use a spindle.  Then I found an alpaca site with felting so I started researching that area of fiber art. Some locally made goat milk soap and some fiber from ebay and we had felted bars of soap.  Then I made the trip over to Zielingers in Frankenmuth and brought home a needle felting kit.  A trip to Mary Maxim where I bought several books and a needle felt kit to make a dog.  Then I found the "Felt a Dog" book for even more inspiration.  With the basics in place I got braver and started 'needleing' (as my 6 yr old calls it) my own creations. I love feeling and watching a dog or other animal take form in my hands.  I start with a roll of fiber and just keep adding a little fiber here, a little there and soon I have a sculpture.  There are times when I think a project is finished and put it away only to pull it out a few days later and realize there is more to be done with it.   Because I also show dogs I try to base my fiber creations on correct representatives of the breed.  
It is spring time so that means that right now I am enjoying the process of harvesting my own fiber. There is just something so satisfying about being in the barn and shearing your own animals.  Last year I used scissors to shear my alpacas.  This year I am better prepared and will be using shears to harvest their fiber. Alpaca shearing will start in May. I have sheared most of my Shetland Sheep in the past two weeks by a combination of rooing, scissors and electric shears.
Right now I am just enjoying the process.  The process begins with feeding and caring for these wonderful animals every day.  I find it to be very grounding to reap the rewards of my labor when I shear them.  Alpaca fiber and wool are renewable sources, just like our hair, they grow their fiber back for the next years harvest.  Alpaca is one of the softest fibers out there.  Because of the way it is constructed items made from alpaca dont have to be bulky in order to be warm, it is truly a luxury fiber.
Besides working full time and having 1 child still at home, I also breed and Shetland Sheepdogs and dabble in photography. I take care of my animals every day and help my husband with the farming.    This summer I am going to giving dying a try with some of the plants growing around the farm.  There are so many different things to do with fiber I hope to give them all a try......hmmmmmm learning to weave looks like fun too........oh, and wet felting......... and....... :-)"

Tuesday, April 6, 2010

Tyeing and Dyeing a Rainbow Playsilk


I recently had someone inquire about how to tie-dye a Rainbow Silk. She was frustrated because her attempts resulted in white areas where the different color section were tied off. This is a common problem that is easily remedied.

In tie-dye, string or rubberbands create an area of 'resist'. This means that the dye is prevented from  going into the area that is tied. In most cases with tie-dye, binding in strategic places helps to control the spread of dye into other areas. This is the case when dyeing a Rainbow Silk.

The key is to tie the string or rubberband tight enough to 'encourage' the dye color to stay in it's designated area, but not too tight that you get a harsh delineation between colors. A nice 'meeting of the color' is what we're after.


I prefer to use cotton kitchen twine to tie my items with. I feel I get better control of the tie and it's tightness with it. I used to use those tiny hair rubberbands, but once I started using the twine, I have never looked back. Artificial sinew works well, too.

I tie my silk off in five sections. One for red, yellow, green, blue, and purple. I generally eyeball the size of each section, maneuvering the tied string when I am finished if the section sizes seem uneven.


After the silk is all tied up and has soaked in the soda ash solution (and is as wet or dry as you like), it's time to start dyeing.   Find a good spot to set-up. When it is warm out I like to set-up outside. Another good spot is the the tub. I set-up using a milk crate with some newspaper on top to dye on. For quick directions on how to mix up your dye, please refer to the Star Mandala tutorial.


I prefer to work from darker to lighter, purple down to red. Freely saturate the open areas of the silk with color, just be careful not to oversaturate creating puddles of dye on your dyeing surface. Things get tight around the area where the color sections meet and have been bound by string. Get the nozzle into the folds around the tied areas and gently squeeze dye into them. This is also a good time to gently give the tied area a squeeze to encourage the dye to get in the nooks and crannies. It also helps to prevent the stark delineation between color sections and encourage blending.


Once you have dyed your whole silk, give it some more gentle squeezes to encourage some nice color blending. wrap your fabric in plastic wrap or a plastic bag to ensure that it stays moist during the curing process. Find a warm spot for you dyed mandala to cure for about 24 hours. For the dye to react and cure properly it needs to be kept at or above room temperature. When it is not sunny and warm outside I like to place my dyed silks on a baking sheet and set it inside the oven(not on).


After your dyed mandala has cured for 24 hours, rinse it out. I use a special textile detergent, but a mild detergent such as Dawn dish soap will do. Fill up a dish tub with fairly hot water and detergent. While still bound, place your dyed mandala in the tub. Swish it around to encourage excess dye out of the fabric. Dump the water and add some more. Add more detergent, too, if you feel it necessary. Swish it a bit more, and then cut the ties binding the folds. Place your mandala back in the tub and swish some more. Dump the water again, and then add more water. On this step I usually let the fabric sit in there for a little while to encourage excess dye to be released. After this, you can pull the fabric out of the tub and do a final rinse under the faucet.

Friday, April 2, 2010

Friday's Fiber Artist(s) - Bacon!

O.k. so Bacon! isn't the name of the fiber artist, and I don't have an individual fiber artist to feature but a few. I have been a little distracted this week by, you guessed it, Bacon! So, I will quickly plug (again) the newest Etsy Street Team, Team Bacon! and move on to featuring some Bacon! inspired fiber artists.

First off, I am going to show you how Bacon! and needle felting find a happy place together. Here at the Dyeworks aka my house, we have just started to explore needle felting. My daughter has really taken to it. So much so that I have barely gotten a chance to do any. She currently working on making a little Easter egg.


Needle felting has been in industrial use since the mid-1800's but wasn't put into use as a handcraft until the 1980's. This is when David and Eleanor Stanwood transferred the needle from an industrial needle felting loom for use as a hand held tool.

The felting is done by the repeated action of 'poking' the fiber with specially designed needles. The needles come in different gauges and the tips are barbed so that the fibers are pulled and pushed together.

Needle felting is very useful to create sculpted and detailed felted pieces, such as these Bacon! bookmarks from Felt Like Helping on Etsy.

Bacon Bookmarks by FeltLikeHelping

Although being a Bacon!ite inspires her work, Felt Like Helping also creates some beautiful needle felted flowers. I definitely appreciate her flowers as my first needle felting project was a flower that went monstrously wrong. I will not post a picture of my monstrosity as I fear the needle felting police would come and repossess my felting supplies! Instead, please bask in one of her flower creations.

Oxeye Daisy Bookmark by FeltLikeHelping

Of course, people still wet felt, which is useful in creating pieces on a larger scale. In this process, the fibers are 'tangled' together by using moisture, heat, and agitation. Some of you may have inadvertently wet felted a nice wool sweater when you tossed it in the washer (oopps!). Welt felting can be done using either a previously knitted/crocheted item or using loose roving.

Chris Chunski has created this awesome Bacon! scarf by wet felting loose wool roving.

We Felted Bacon Scarf by Chris Chunski

Speaking of scarves, here are a couple of Bacon!y creations using a fiber art medium close to my heart, silk and dye. The first is from an fiber artist we have already gotten to know here, TeeGee.


Bubble Silk Bacon Scarf by TeeGee

This scarf, handpainted by Crrysstall on Etsy, is a light and whimsical take on wearing your favorite food.

Hand Painted Silk Bacon Scarf by Crrysstall

O.K. (looks out the window to check outside), the Universe hasn't gone haywire because I've  combined two of my favorite things in one blog post! All is good. Go forth, eat Bacon! and create!

Thursday, April 1, 2010

Team Bacon!


It's a craze that's sweeping the nation, Bacon! Well, o.k. not really. But if it did we would be a happier and more unified world. Bacon! brings people together. A perfect example is a group of us creative and slightly zany (boy, that's an understatement) Etsyians.

So, we've made our Bacon! solidarity official by joining forces and forming Team Bacon! Here's a few words from our fearless leader Allegro.

"So what does Team Bacon! do, and what do we have in store for the future?
Like any other Etsy team, our primary goal is to join together sellers with a common interest and use our collective talents to promote our work. But Team Bacon! is more than just that. We are a collection of very unusual, humorous, and highly talented crafters. We don't follow trends, we make them."


In a Bacon! powered frenzy we have created a Team blog, a Fan Page on Facebook, and we're on Twitter. It's amazing what a little bacony motivation can get accomplished in a little over a week!

The blog is simply wonderful. Not only can you find links to wonderful Etsy shops, but there are bacon recipes and a bit of trivia, to boot. We are also trying to team up with the charity organization  SixDegrees.org to turn the power of Bacon! into a force for good.

Our last hurdle is to be officially recognized by Etsy so we can get our marketing into full swing. So, I say, "Free the Bacon!"

Oh, how could I forget the wonderful giveaways! Here is the current giveaway. A cute ACEO print by our own Moonstr.

Speck ist gut by Moonstr

La gente, unido, siempre queiran tocino!

Friday, March 26, 2010

Friday's Fiber Artist - Cactus Bloom Fibers

Ooo..how exciting and luscious! This week's featured artist is Cactus Bloom Fibers.

CoreSpun Recycled Silk Yarn by Cactus Bloom Fibers 

As exemplified by the above silk yarn spun from a recycled silk, Patricia of Cactus Bloom Fibers has given a modern twist to the ancient art of fiber spinning. It is also a wonderful example of her versatility; dyeing and spinning traditional fibers AND transferring this process to non-traditional spinning materials from the world around her. Just take a look at this scarf!

Handspun Wool and Recycled Silk Tie Scarf by Cactus Bloom Fibers
The spinning of fibers into yarn is a fiber art form that dates back to prehistoric times. It evolved from rolling tufts of fiber along the leg, to attaching fiber to a stone and twirling, to a spindle and distaff, and the "revolutionary" spinning wheel. Modern industrial spinning techniques make use of high-speed rotary and open-ended spinning.

Hand-dyed Fiber by Cactus Bloom Fibers
 Though there are many varieties of spun fiber at the big name craft stores, it is artists like Patricia that keep the medium alive and fresh. It is the individual artistic whim that gives handdyed roving and handspun yarns the perfect touch for yarn and needle crafts. The ability to create unique items from the yarn and fiber at Cactus Bloom Fibers is abundant!

Handspun Thick and Thin Worsted Merino Wool Yarn by Cactus Boom Fibers

Plumberry Handspun Art Yarn by Cactus Bloom Fibers
Let's hear from Patricia about how her love of color and interest in spinning came to be:
"Cactus Bloom Fibers is a name I chose for my business because I consider myself a desert transplant.  I currently live in Springfield, Missouri but grew up in Arizona.  When I was coming up with ideas for a name, I kept coming back to cactus blooms.  In Arizona, my brother and I used to explore the desert and mountains around us.  My family used to take us on hiking trips around the state, as well.  To me, the desert is beautiful - and one of the most beautiful things you can see are cactus in bloom with bright luscious yellows, pinks or reds.  Those seem to be the colors I use most in my dyeing, including large amounts of green.
 
I have a passion for color, but texture is wonderful, too.  I love working with natural fibers such as wool and silk. I enjoy dying & blending my own fibers and spinning them into interesting & beautiful yarn.
 
I've dabbled in a lot of creative fields, such as silversmithing & jewelry making, quilting, sewing, knitting and needlework.  Lately, I've been designing felt brooches/baubles to coordinate with my handspun yarn.  I've noticed that my best creative moments come when there is no pressure to create - and I'm just living in the moment, enjoying the process.

A few years ago, I became intensely interested in the process of dyeing yarn and fiber. I did quite a bit of online research, read online tutorials (there's tons of them online), checked out books at the library, bought books and also watched any program on TV that had anything to do with spinning or dyeing fiber that I could find. The only thing I didn't do was take a class. I'm just not a class-taker. I like learning independently and and some classes can move at a pace that puts me to sleep!

If someone were to ask me why I love spinning colorful fibers into yarn, I would say that it's the tactile quality that is so appealing. I bet that is why most women who spin yarn like it, too. What's really wonderful to me about dyeing fibers and spinning them into yarn is that I get to use my creativity to make fiber art, but in turn, that fiber art is something that can be made into something useful and beautiful.  It's a 2-in-1 process that I just find amazing.  I would also say that wool is my all-time favorite fiber (as is probably for many spinners). When someone asks me why I love wool so much, I usually say "There's just something about wool..." because I don't want to lecture them on all the wonderful attributes it has - and some people get the glassy-eyed look that tells me I'm being too educational.

I stay busy working full-time at an office job during the day, winning bread, etc. for my family...The most positive thing I can say about the office job is it gets any need for structure and orginazation out of my system.  When I am home working on the fiber arts, I can just let go and let the creativity kick in.  Of course, there's kids to deal with, pets to feed, dinner to be fixed and hopefully (if I'm being really good - 20 minutes of exercise to fit in somewhere).  The weekends are my big creative-outlet time.  
I would love to work as a full-time fiber artist some day and maybe fill any needs for structure or organization in other ways."


Thank you Patricia for sharing a little bit about yourself and Cactus Bloom Fibers. By the way, my daughter has suggested that the roving below would be a perfect choice for me to buy her for her next needle felting project!

Garden Flow Falkland Wool Roving by Cactus Bloom Fibers

Friday, March 19, 2010

Friday's Fiber Artist - TeeGee

Hello fiber arts lovers! I am very excited to be featuring this weeks artist, TeeGee.


Oak Flame Velvet Shibori Scarf by TeeGee
TeeGee is also known as Mom, Beth, and quite possibly "Hey, Lady".  Like many who love fibers and textiles, Beth has fallen for more than one medium. After focusing on quilting off and on for 8 years, she has turned her creative inquisitiveness to the Japanese art of Shibori. This is a form of pleating, folding, stitching, binding, and dyeing of fabric that can be traced back to 8th Century Japan.

Velvet Bomaki and Arashi Shibori Scarf by TeeGee
Beth utilizes various Shibori techniques to create the magnificent scarves at TeeGee's. These methods include Bomaki Shibori and Arashi Shibori. In the Bomaki method, the scarf is dyed, stiched, then compressed on a large pole. After it is compressed on the pole, the color is discharged from certain areas and then overdyed with another color. In Arashi, the scarf is stitched, then compressed and wrapped on a large pole, which creates areas of resist where the dye cannot penetrate. Then thickened dye is applied to the pole wrapped scarf.

Although anyone who knows me is familiar with my love of silk scarves(you should see my coat rack), I absolutely love the Bamboo Rainbow Socks. I love how she incorporates the use of Shibori to create these fun and colorful socks.

Hand Dyed Rainbow Socks for Little Kids by TeeGee


Here is Beth in her own words describing her creative evolution:

"As a kid and in high school I tended to gravitate away from sewing and needlework as crafts and more towards building and tactile type arts, like pottery and sculpture.

I returned to sewing as an adult, first as a utilitarian quest, making linens and so forth for our apartment and making costumes and sometimes clothes for my little ones.  Quilting caught my attention early on and I found I really enjoyed staying up till all hours after the kids were asleep designing & piecing quilt tops.  Like a lot of quilters I have come across- I seemed to have an aversion to actually finishing them.  I just like the designing & piecing. There is a shelf full of unfinished quilts- just waiting for me to get them sandwiched and quilted.

It was when I was looking for “just the right color” for a quilt I was putting together, that I tried dyeing my first fabric, just a few fat quarters, in the sink.  I loved doing it but didn’t really have enough room to go all out with a dye studio, so that hobby was shelved till about 2006 when I picked it back up again and I started dyeing gradations and full color wheels on cotton. Soon after I started doing scarves in Low Water Immersion- which I really love doing because in a way it seems so simple but can go oh so wrong if the wrong colors start blending. 

I also love playing with wax on fabric, and honestly I think the most “fun” is using splattering soy wax in random patterns. I’ve also experimented with mono-printing with thickened dye, and various kinds of resists like potato & corn starch, and even old fencing from my garden.

I’ve been reading and studying about shibori for the last few years, I love the effects of the colors on velvet, especially when discharged and overdyed a few times. It’s always a surprise, usually a good one.  It is very labor intensive, but so worth it when you unravel the threads and start rinsing – I love that moment more than any other when I’m working with dyes.

I have a bit of creative ADD- as I can’t quite always focus on one thing. Right now I’m taking advantage of a new sewing machine and finally returning to using the raw fabrics I’ve dyed. So far in the works: a quilt and several shawls & constructed scaves and a few bags.  I’ve also finally tried dyeing fiber again and hope to find a way to work it into my work with all these textiles.  I love the process of taking boring white fabrics and manipulating it texturally and with color to make something completely different. Now if I could only find the time after my day job and my family to do that on a regular basis- then I’d be golden."


Batiked Willow Branch SIlk Charmeuse Scarf by TeeGee

I want to give a big thanks to Beth for allowing me to feature her and TeeGee on Desert Dyeworks. If you have any questions about Shibori or any other techniques that Beth uses, please feel free to leave a comment with your questions.

Happy Friday!

Wednesday, March 17, 2010

Star Mandala Tutorial Part 2 - Dyeing


So you've let your folded and bounded fabric soak in a soda ash solution for about 15 minutes. I prefer to let my items dry after the soda soak. You can do this, or wring out excess solution and get busy dyeing. So, let's get to it!

Find a good spot to set-up. When it is warm out I like to set-up outside. Another good spot is the the tub. I set-up using a milk crate with some newspaper on top to dye on.

So, let's get the dye ready! Using a glass jar with a good lid is great for getting the dye thoroughly mixed. Once you have put on your dust mask, fill your jar with one cup of water. If you want to make a lesser amount of dye, that's fine. Just adjust the amount of dye and water proportionally. For 1 cup of water add 1 tbsp. of dye powder. Secure the lid on your jar, and shake vigorously. Some colors mix more easily than others i.e. yellows vs. reds. Shake until all the dye particles are dissolved. Funnel your mixed dye into a squeeze bottle.

So, your dye is mixed and your dye area is set-up. Put on your gloves and get dyeing!


I prefer to start at the tip of the mandala and work my way outward. When working on smaller areas using steady drips of dye instead of a stream of dye gives you better control of where the dye goes. It also helps to keep you from applying too much dye and ending up with a puddle of dye on your dyeing surface. When you are getting the dye on folded areas and areas around where the folds are bound, it helps to stick the nozzle into the folds to get the dye down into the fabric.

Once you have completed dyeing one side of the mandala, flip it over and begin dyeing the other side. A quick note though, I prefer to wait to dye the outer fill color area of the fabric until after I have dyed both sides of the inner mandala.

Get the tip of the bottle into the folds
 When dyeing the outer fill color area, you can use one color or use more than one. When I use more than one color, I start with the lighter color first, and then add the darker color(s) in lesser amounts. When applying the dye here, I give the fabric gentle squeezes to encourage the dye into the inner layers. I then flip the fabric over, and then apply the dye similarly to this side.Once you have finished dyeing, wrap your fabric in plastic wrap or a plastic bag to ensure that it stays moist during the curing process. Find a warm spot for you dyed mandala to cure for about 24 hours. For the dye to react and cure properly it needs to be kept at or above room temperature. When it is not sunny and warm outside I like to place my dyed silks on a baking sheet and set it inside the oven(not on).

Apply dye to the outer area last
After your dyed mandala has cured for 24 hours, rinse it out. I use a special textile detergent, but a mild detergent such as Dawn dish soap will do. Fill up a dish tub with fairly hot water and detergent. While still bound, place your dyed mandala in the tub. Swish it around to encourage excess dye out of the fabric. Dump the water and add some more. Add more detergent, too, if you feel it necessary. Swish it a bit more, and then cut the ties binding the folds. Place your mandala back in the tub and swish some more. Dump the water again, and then add more water. On this step I usually let the fabric sit in there for a little while to encourage excess dye to be released. After this, you can pull the fabric out of the tub and do a final rinse under the faucet.
Result of color combo used for this tutorial
Hang to dry or toss it into the dryer.
Voila! You have your mandala!

Monday, March 15, 2010

Star Mandala Tutorial Part 1- Folding


Though the results can look amazing, this fold is relatively simple. You will need your fabric, I'm using a square of silk, a washable marker, a ruler or straight edge, and string to bind your fabric. Oh, almost forgot, you'll need a squirt bottle set to a mist spray.

The first step is to fold your fabric into quarters. Give it a spritz of water so that it is slightly damp and the layers stick together. I also take the opportunity to smooth out wrinkles.Place your finger at the center corner of your quartered piece of fabric. Keeping your finger on this corner, fold your fabric again to create a pie wedge. Your fabric is now folded in 8ths. Fold once more to create a narrower piece of pie. Your fabric is now folded in 16ths.

16ths pie-wedge and marking fold lines
Using a ruler or a straight edge, draw a diagonal line from one edge of the pie wedge to the other. Draw a few more lines along the length of your folded fabric. These will give you a guide as to where to fold and tie. They also will help delineate your bands of color when you dye your star.
Accordion fold along the lines that you have drawn. I prefer to bind each line/fold separately. Again, these will act as a guide as to where to apply dye.

Binding the folds

An accordion fold is the basic pleating of the fabric. This is done by carefully gathering the fabric by means of gently pushing and pulling the folds together. For thinner and smaller fabrics like the silk used in this tutorial, the height of the folds should not be more than a 1/2 inch high. Thicker fabrics can require taller folds. Otherwise it can become unwieldy to work with.

Accordion fold


Folded and bound mandala star


Saturday, March 13, 2010

Pay Attention!

O.K. that is mostly as a reminder to myself to not ignore this blog. However, it is notice to all who may stumble upon my colorful world here. Pay attention, there's good stuff comin'!

So, what does this 'good stuff' entail? You most likely won't see descriptions of last nights dinner, well, unless it was totally awesome. What you will see is a window into the world of fiber arts and incredible creativity. I will be sharing my exploits in introducing fabric to color, as well as how to do some of this stuff yourself.

Of course, I am not the end all and be all of fiber arts so I must search out all those other wonderful fiber artists out there. I can't wait to share as many of them as I can with you.

So...stay tuned and PAY ATTENTION!

Sunday, January 3, 2010

Picture Day

What a beautiful sunny and warm Southwestern Winter's day! It was a perfect day for taking updated pictures of the Fairy Skirts. It's not that the Rainbow skirts have changed but more for the fact that the model in the original photo has grown like a weed and I have a better camera now!
Here is the old product pic...
Align Center


And here is the updated picture(well, one of them at least!)


If I remember correctly, she was about 3-years old in that first picture. I would guesstimate that she is twice as tall now as she was then, if not more. Though a few things have definitely not changed. Her curly hair and her big attitude! I love both!

This picture is a typical face. I call it the "What can I get away with while I am being extra cute"face.